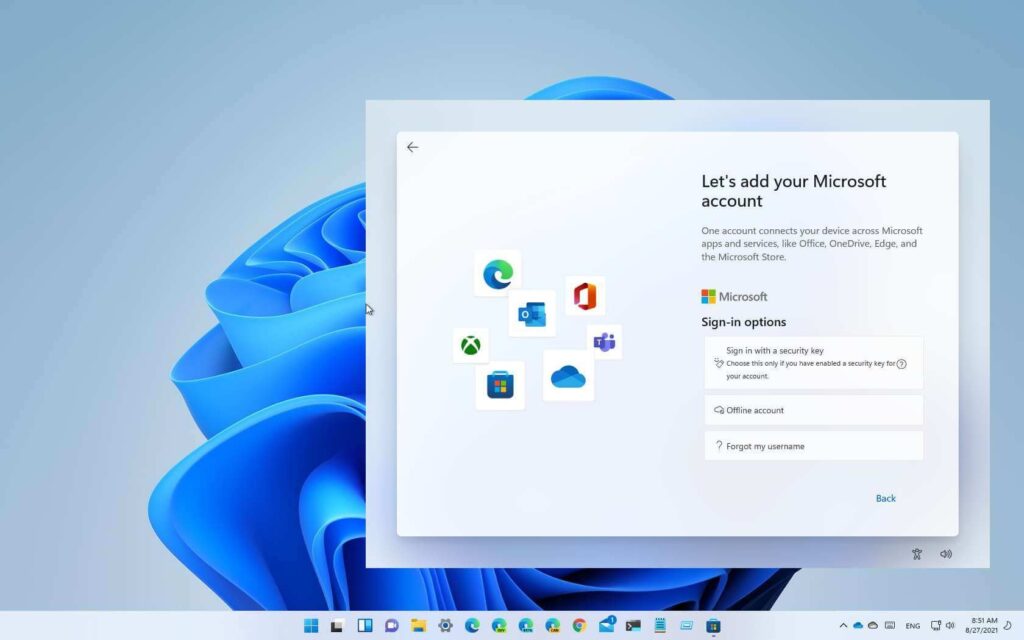
Setting up Windows 11 without a Microsoft account used to be as simple as entering a fake email address, prompting the system to create a local account. However, recent updates have patched this trick. Fortunately, there are still ways to bypass the Microsoft account requirement, though some methods involve more steps than others.
Using Rufus
One effective method involves using Rufus, a free tool for creating bootable USB drives. Here’s how to do it:
- Download Windows 11 ISO: Get the Windows 11 ISO from Microsoft’s website.
- Install Rufus: Download and install Rufus on your computer.
- Prepare a USB Drive: Use a USB drive with at least 8GB of free space. Backup any data on the drive as it will be erased during the process.
- Create Bootable USB:
- Connect the USB drive and open Rufus.
- Select the USB drive in Rufus.
- Select the downloaded Windows 11 ISO.
- Click Start.
- Customize Windows Installation:
- A pop-up will ask if you want to customize your installation.
- Select Yes and check the following options:
- Remove requirement for 4GB+ RAM, Secure Boot, and TPM 2.0 (for unsupported PCs).
- Remove requirement for an online Microsoft account.
- Create a local account with a username.
- Disable data collection (skip privacy questions).
- Install Windows 11:
- Let Rufus complete the process.
- Insert the USB drive into the computer you want to set up.
- Turn on the computer and press F11 or DEL to access the boot menu.
- Select Boot from Drive and follow the on-screen instructions to install Windows 11 without needing a Microsoft account.
For more detailed steps, refer to guides on upgrading an unsupported PC to Windows 11.
Using Command Prompt
If Windows is already installed, using Rufus might be cumbersome. Another method involves using a command during the setup process:
- Start Setup: Begin the device setup process for Windows 11.
- Open Command Prompt: Press Shift + F10.
- Enter Command: Type
OOBE\BYPASSNROand press Enter. This will force the system to reboot. - Select Network: After rebooting, you should see an option to proceed without internet.
- Create Local Account: Without internet, the system will allow you to create a local account.
Note: This method can be unreliable and might be patched out by Microsoft in the future.
Using Tiny11Builder
For a more customized approach, Tiny11Builder can create a stripped-down version of Windows 11 without a Microsoft account and other bloatware. This method is advanced and recommended only for users comfortable with detailed technical steps.
Disconnecting Your Microsoft Account
If Windows 11 is already installed with a Microsoft account, you can switch to a local account:
- Go to Settings: Open Settings > Accounts > Your Info.
- Switch to Local Account: Select “Sign in with a local account instead.”
- Create Local Account: Follow the prompts to create a local account and enter a password.
This method retains access to your Microsoft account data but disconnects the account from the cloud.
Features Missed Without a Microsoft Account
Using a local account means missing out on several features:
- Copilot access
- OneDrive syncing
- Microsoft Store access
- Restoring Windows from OneDrive backups
- Personalization syncing
These features collect some data to enhance user experience and improve services. Decide based on your preference whether the trade-off is worth it for you.